DealDash Series: Spooky Crafts – Bags

Welcome to DealDash’s Halloween Craft Series. Over the next few weeks I will be posting blog articles of various Halloween-related crafts that you can do with your kids, grandkids, or even by yourself! Today’s craft is handmade treat bags.
Whether you’re going trick or treating with children, or staying home and handing out the candy it’s more fun to have a handmade bag! They are great for storing the candy if you’re the door-opener, or for taking around the neighborhood and ringing door bells. Read on for a couple of different styles of treat bags that are fun to make and cute to look at!

Cereal Box Stencil Bags
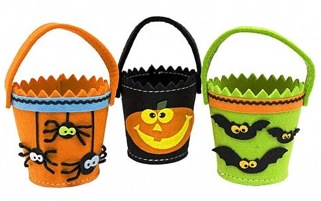
Personalized Treat Buckets
These are great buckets to keep the candy in that you will be handing out at the door.
Materials:
-Large empty ice cream bucket with a handle
-Felt, multiple festive colors is recommended
-Hot glue gun
-Ribbon, 6 yards per bucket
-Foam stamps in fun Halloween shapes such as bats or skulls
Instructions:
1. Apply the felt to the bucket using the hot glue gun. Cover the entire surface around the outside. Use more than you need to, and cut off the excess.
2. Glue your ribbon to the top and bottom of the bucket so that you cover up the felt edges. It just looks much nicer and more “put together” this way.
3. Tie contrasting colored ribbons on the handle.
4. Stick on the fun foam shapes to decorate your bucket. These foam shapes usually have a sticky back, but if you would like to reinforce your foam shapes, just use a little hot glue from the gun.
I hope that you enjoyed our first Halloween crafts article. DealDash has some great craft auctions such as sewing machines, sergers, and more. Visit DealDash to see the craft auctions. Just click this link here and see how much you can save. Good luck and happy bidding everyone!